134
Why Being Listed on Z Platform Matters — For Businesses and Customers
46
imgpost/134/logopost.jpg
Advertising/Communication
Views :
85
Date add :
05/03/2026
 Why Being Listed on Z Platform Matters — For Businesses and Customers In today's digital world, finding the right professional for your project can feel overwhelming. There are thousands of listings, ads, and opinions online—but how many of them are truly real, verified, and trustworthy?At Z Platform, we are changing that.For Users: Hire With ConfidenceWhen you're rea...
Why Being Listed on Z Platform Matters — For Businesses and Customers
In today's digital world, finding the right professional for your project can feel overwhelming. There are thousands of listings, ads, and opinions online—but how many of them are truly real, verified, and trustworthy?At Z Platform, we are changing that.For Users: Hire With ConfidenceWhen you're rea...
|
133
The Moment Is Now: Help Build the Future with Z Platform
19
imgpost/133/logopost.jpg
Business Opportunities
Views :
166
Date add :
05/01/2026
 The Moment Is Now: Help Build the Future with Z Platform There comes a moment in every journey when vision meets reality.For Z Platform, that moment is now.For years, we've been building—quietly, consistently, and relentlessly.Designing tools. Connecting people. Creating opportunities.Today, Z Platform is no longer just an idea.It's working. It's growing....
The Moment Is Now: Help Build the Future with Z Platform
There comes a moment in every journey when vision meets reality.For Z Platform, that moment is now.For years, we've been building—quietly, consistently, and relentlessly.Designing tools. Connecting people. Creating opportunities.Today, Z Platform is no longer just an idea.It's working. It's growing....
|
132
Manage Your Business the Smart Way with Z Platform
46
imgpost/132/logopost.jpg
Advertising/Communication
Views :
627
Date add :
04/10/2026
 Manage Your Business the Smart Way with Z Platform Running a business today requires organization, speed, and the right tools. Many business owners struggle using multiple apps to manageclients, invoices, schedules, and daily operations.Z Platform brings everything together in one place —simple, powerful, and built for your everyday needs.All-in-One...
Manage Your Business the Smart Way with Z Platform
Running a business today requires organization, speed, and the right tools. Many business owners struggle using multiple apps to manageclients, invoices, schedules, and daily operations.Z Platform brings everything together in one place —simple, powerful, and built for your everyday needs.All-in-One...
|
131
Build Your Path to Success with Z Platform
19
imgpost/131/logopost.jpg
Business Opportunities
Views :
843
Date add :
03/26/2026
 Build Your Path to Success with Z Platform Tools, Visibility, and Strategy to Grow Your BusinessIn today's digital world, having a strong online presence is no longer optional — it is essential. Businesses that position themselves early, stay active, and use the right tools gain a clear advantage over the competition.At Z Platform by Zbynet,...
Build Your Path to Success with Z Platform
Tools, Visibility, and Strategy to Grow Your BusinessIn today's digital world, having a strong online presence is no longer optional — it is essential. Businesses that position themselves early, stay active, and use the right tools gain a clear advantage over the competition.At Z Platform by Zbynet,...
|
130
Zbynet: A Digital Platform Built to Empower Businesses and People
46
imgpost/130/logopost.jpg
Advertising/Communication
Views :
901
Date add :
03/15/2026
 Zbynet: A Digital Platform Built to Empower Businesses and People In today's fast-changing digital world, many entrepreneurs, professionals, and small businesses still struggle to maintain a strong online presence, organize their daily operations, and reach new customers effectively. That is where Zbynet comes in.Zbynet is a multifunctional digital platform create...
Zbynet: A Digital Platform Built to Empower Businesses and People
In today's fast-changing digital world, many entrepreneurs, professionals, and small businesses still struggle to maintain a strong online presence, organize their daily operations, and reach new customers effectively. That is where Zbynet comes in.Zbynet is a multifunctional digital platform create...
|
129
Z Business Strategy to Success
26
imgpost/129/logopost.jpg
Coaching/Training
Views :
1908
Date add :
01/30/2026
 Z Business Strategy to Success Step 1 — Open Your Account, Create Your Channel, ActivateYour GrowthWelcome to the . Thisis not just a guide — it's a practical roadmap designed to help you organizeyour presence, amplify your voice, and turn your work into real opportunities.Everything starts with one essential step. Miss thisstep,...
Z Business Strategy to Success
Step 1 — Open Your Account, Create Your Channel, ActivateYour GrowthWelcome to the . Thisis not just a guide — it's a practical roadmap designed to help you organizeyour presence, amplify your voice, and turn your work into real opportunities.Everything starts with one essential step. Miss thisstep,...
|
128
Build a High-Growth Company Without Silicon Valley: A Real-World Playbook for Entrepreneurs
46
imgpost/128/logopost.jpg
Advertising/Communication
Views :
1637
Date add :
01/29/2026
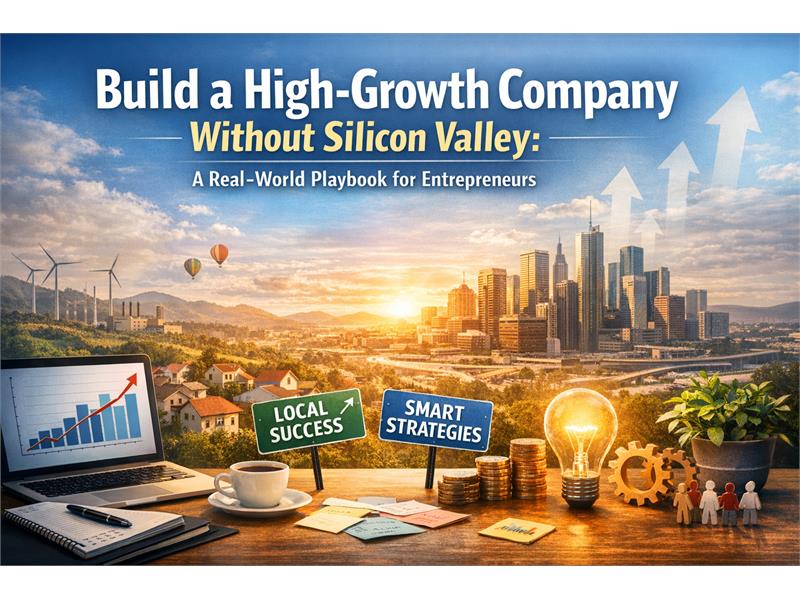 Build a High-Growth Company Without Silicon Valley: A Real-World Playbook for Entrepreneurs Build a High-Growth Company Without Silicon Valley: AReal-World Playbook for EntrepreneursSilicon Valley became shorthand for “startup success.” Fastfunding, huge valuations, and a culture that celebrates speed above everything.But here's the truth most entrepreneurs learn the hard way: copying Sili...
Build a High-Growth Company Without Silicon Valley: A Real-World Playbook for Entrepreneurs
Build a High-Growth Company Without Silicon Valley: AReal-World Playbook for EntrepreneursSilicon Valley became shorthand for “startup success.” Fastfunding, huge valuations, and a culture that celebrates speed above everything.But here's the truth most entrepreneurs learn the hard way: copying Sili...
|
126
Humanoid Robots at Scale: A Breakthrough With Civilization-Level Consequences
17
imgpost/126/logopost.jpg
Computer/Internet Services
Views :
1674
Date add :
01/23/2026
 Humanoid Robots at Scale: A Breakthrough With Civilization-Level Consequences Humanoid Robots at Scale: A Breakthrough WithCivilization-Level ConsequencesAnd Why the Real Question Is Governance, Ownership, andDemocratic LimitsHumanoid robots are moving from science fiction intocommercial reality. Projects like Tesla's Optimus symbolize a new era ofautomation: not just softwar...
Humanoid Robots at Scale: A Breakthrough With Civilization-Level Consequences
Humanoid Robots at Scale: A Breakthrough WithCivilization-Level ConsequencesAnd Why the Real Question Is Governance, Ownership, andDemocratic LimitsHumanoid robots are moving from science fiction intocommercial reality. Projects like Tesla's Optimus symbolize a new era ofautomation: not just softwar...
|
127
101 Small Business Ideas to Start in 2026
19
imgpost/127/logopost.jpg
Business Opportunities
Views :
1933
Date add :
01/23/2026
 101 Small Business Ideas to Start in 2026 101 Small Business Ideas toStart in 2026(California + Brazil Edition — AI + Local Services +Online Growth)CATEGORY 1 — Home Services(High Demand, Fast Cash Flow)Paver installation & repairDriveway demolition & replacementBackyard patio remodelingConcrete leveling & pressure washingArtificial turf in...
101 Small Business Ideas to Start in 2026
101 Small Business Ideas toStart in 2026(California + Brazil Edition — AI + Local Services +Online Growth)CATEGORY 1 — Home Services(High Demand, Fast Cash Flow)Paver installation & repairDriveway demolition & replacementBackyard patio remodelingConcrete leveling & pressure washingArtificial turf in...
|
125
Keep Your Z Page Online Keep Your Business Connected
26
imgpost/125/logopost.jpg
Coaching/Training
Views :
2235
Date add :
01/07/2026
 Keep Your Z Page Online Keep Your Business Connected Keep Your Z Page Online. Keep Your Business Connected.In today's digital world, your online presence is more than a page — it's a living connection between your business, your clients, and your network. Keeping your Z Page active with an annual subscription ensures that your links stay online, acces...
Keep Your Z Page Online Keep Your Business Connected
Keep Your Z Page Online. Keep Your Business Connected.In today's digital world, your online presence is more than a page — it's a living connection between your business, your clients, and your network. Keeping your Z Page active with an annual subscription ensures that your links stay online, acces...
|
124
Z Platform: The Place to Be for Entrepreneurs and Business Growth
46
imgpost/124/logopost.jpg
Advertising/Communication
Views :
1989
Date add :
12/26/2025
 Z Platform: The Place to Be for Entrepreneurs and Business Growth The Z Platform is officially open — and ready for anyone who believes in entrepreneurship, innovation, and sustainable business growth.Built to support small and medium-sized businesses, independent professionals, creators, and entrepreneurs, Z Platform was designed with one clear mission: to make o...
Z Platform: The Place to Be for Entrepreneurs and Business Growth
The Z Platform is officially open — and ready for anyone who believes in entrepreneurship, innovation, and sustainable business growth.Built to support small and medium-sized businesses, independent professionals, creators, and entrepreneurs, Z Platform was designed with one clear mission: to make o...
|
123
How You Can Make Money with Zbynet
19
imgpost/123/logopost.jpg
Business Opportunities
Views :
2712
Date add :
12/11/2025
 How You Can Make Money with Zbynet — Starting with Just $179/YearThe digital world is changing — and with it, the way people connect, communicate, do business, and earn rewards online.Zbynet was created for people like you.People who want to be present, connected, rewarded, and part of something that grows together.And the best part?...
How You Can Make Money with Zbynet
— Starting with Just $179/YearThe digital world is changing — and with it, the way people connect, communicate, do business, and earn rewards online.Zbynet was created for people like you.People who want to be present, connected, rewarded, and part of something that grows together.And the best part?...
|
122
Why Now Is the Best Time to Secure Your Spot on the Z Business Directory
46
imgpost/122/logopost.jpg
Advertising/Communication
Views :
2651
Date add :
11/21/2025
 Why Now Is the Best Time to Secure Your Spot on the Z Business Directory The online world is changing fast — and right now, a major shift is happening inside the Zbynet ecosystem. The Z Business Directory is growing at an incredible pace, and for small and medium-size business owners, this moment represents a unique opportunity to secure long-term visibility, credibility...
Why Now Is the Best Time to Secure Your Spot on the Z Business Directory
The online world is changing fast — and right now, a major shift is happening inside the Zbynet ecosystem. The Z Business Directory is growing at an incredible pace, and for small and medium-size business owners, this moment represents a unique opportunity to secure long-term visibility, credibility...
|
121
Immigrants in America: A Changing Promise, A Shared Future
12
imgpost/121/logopost.jpg
Community / Religion
Views :
2347
Date add :
11/15/2025
 Immigrants in America: A Changing Promise, A Shared Future Why this conversation matters now — and why we need your voiceFor generations, the United States has been a beacon for immigrants searching for safety, work, and a place to build their future. The moment of naturalization — raising a hand and taking an oath — has long symbolized a powerful, mutual c...
Immigrants in America: A Changing Promise, A Shared Future
Why this conversation matters now — and why we need your voiceFor generations, the United States has been a beacon for immigrants searching for safety, work, and a place to build their future. The moment of naturalization — raising a hand and taking an oath — has long symbolized a powerful, mutual c...
|
120
The Advancements in AI Technology and Why You Should Join Zbynet Platform Today
19
imgpost/120/logopost.jpg
Business Opportunities
Views :
3517
Date add :
11/01/2025
 The Advancements in AI Technology and Why You Should Join Zbynet Platform Today Artificial Intelligence (AI) has revolutionized the way we live, work, and connect. Every day, new advancements in AI technology are transforming industries—from how we communicate with clients to how we manage businesses online. Small and medium-sized businesses now have access to tools once reserv...
The Advancements in AI Technology and Why You Should Join Zbynet Platform Today
Artificial Intelligence (AI) has revolutionized the way we live, work, and connect. Every day, new advancements in AI technology are transforming industries—from how we communicate with clients to how we manage businesses online. Small and medium-sized businesses now have access to tools once reserv...
|
119
The Best Reasons to List and Create Your Page on Z Platform
19
imgpost/119/logopost.jpg
Business Opportunities
Views :
3490
Date add :
10/22/2025
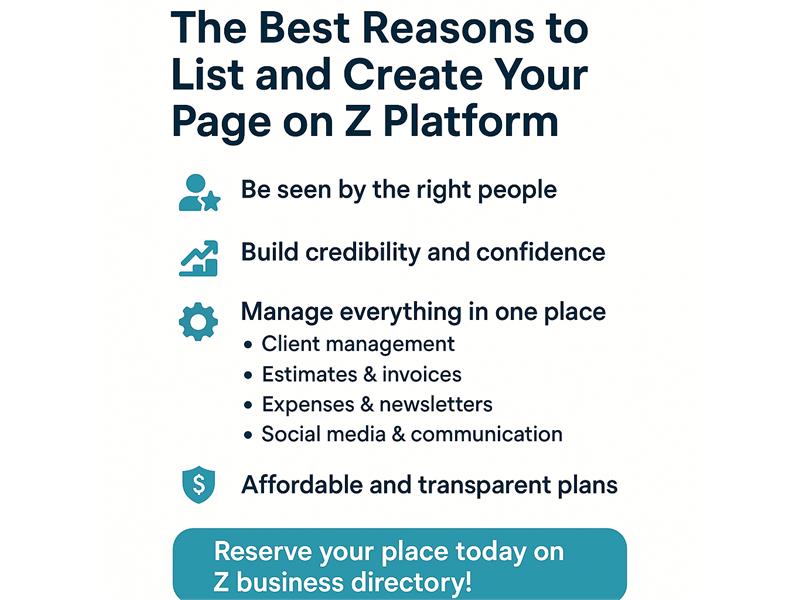 The Best Reasons to List and Create Your Page on Z Platform In today's digital world, visibility and connection are everything. That's why creating your business page on Z Platform is one of the smartest moves you can make for your company.1. Be Seen by the Right PeopleZ Platform is a growing network built for entrepreneurs, professionals, and local business...
The Best Reasons to List and Create Your Page on Z Platform
In today's digital world, visibility and connection are everything. That's why creating your business page on Z Platform is one of the smartest moves you can make for your company.1. Be Seen by the Right PeopleZ Platform is a growing network built for entrepreneurs, professionals, and local business...
|
118
The Problem: The End of the Millionaire-Liquidity Era?
11
imgpost/118/logopost.jpg
Banks/Financial Services
Views :
3337
Date add :
10/18/2025
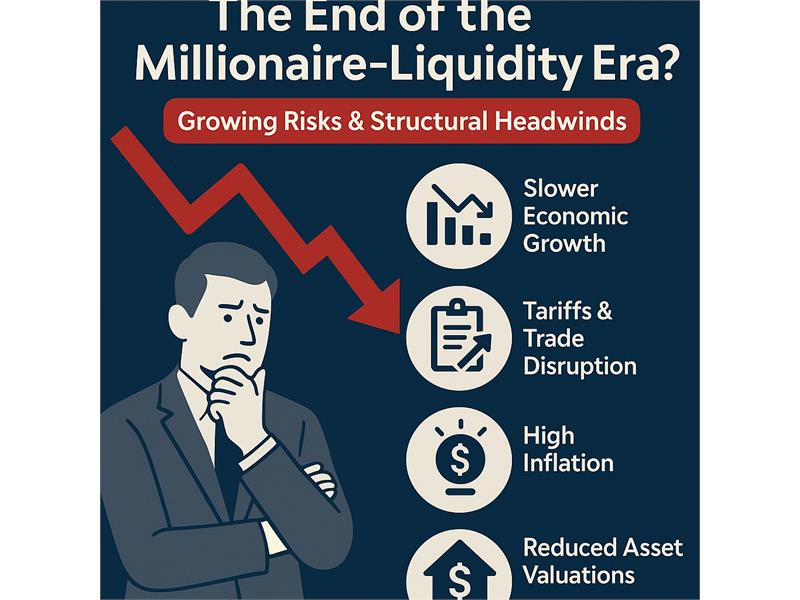 The Problem: The End of the Millionaire-Liquidity Era? Growing risks & structural headwindsThe U.S. economy is facing a confluence of forces that are undermining what I'll call the “millionaire-liquidity” environment — that is, the era in which large private wealth, easy credit, high asset valuations, consumption driven by affluent households, and optim...
The Problem: The End of the Millionaire-Liquidity Era?
Growing risks & structural headwindsThe U.S. economy is facing a confluence of forces that are undermining what I'll call the “millionaire-liquidity” environment — that is, the era in which large private wealth, easy credit, high asset valuations, consumption driven by affluent households, and optim...
|
117
Together for Humanity: Reaffirming President Lula's Call at the UN
12
imgpost/117/logopost.jpg
Community / Religion
Views :
4158
Date add :
09/25/2025
 Together for Humanity: Reaffirming President Lula's Call at the UN When President Luiz Inácio Lula da Silva addressed the United Nations, he did more than deliver a political speech—he issued a wake-up call to humanity. His pronouncement was not simply a reflection on the problems of our time, but a moral appeal for unity, responsibility, and action. In a world inc...
Together for Humanity: Reaffirming President Lula's Call at the UN
When President Luiz Inácio Lula da Silva addressed the United Nations, he did more than deliver a political speech—he issued a wake-up call to humanity. His pronouncement was not simply a reflection on the problems of our time, but a moral appeal for unity, responsibility, and action. In a world inc...
|
116
Estamos Estarrecidos: O Voto de Fux e os Riscos à Lógica Jurídica no Brasil
4
imgpost/116/logopost.jpg
Legal/Law Services
Views :
6028
Date add :
09/11/2025
 Estamos Estarrecidos: O Voto de Fux e os Riscos à Lógica Jurídica no Brasil A sociedade brasileira acompanha com perplexidade o voto proferido pelo ministro Luiz Fux no julgamento dos acusados de atentarem contra a ordem democrática. Não se trata apenas de divergência jurídica: o que se observa é uma condução que abre caminhos perigosos e sem volta para a lógica do Direito,...
Estamos Estarrecidos: O Voto de Fux e os Riscos à Lógica Jurídica no Brasil
A sociedade brasileira acompanha com perplexidade o voto proferido pelo ministro Luiz Fux no julgamento dos acusados de atentarem contra a ordem democrática. Não se trata apenas de divergência jurídica: o que se observa é uma condução que abre caminhos perigosos e sem volta para a lógica do Direito,...
|
115
A Teoria do Desdobramento do Tempo
9
imgpost/115/logopost.jpg
Media/Books/Publishing
Views :
13948
Date add :
08/16/2025
 A Teoria do Desdobramento do Tempo de Jean-Pierre Garnier MaletVivemos em uma era em que ciência, espiritualidade e filosofia buscam pontos de encontro para explicar nossa experiência no mundo. Entre as teorias que mais chamam a atenção nesse cenário está a Teoria do Desdobramento do Tempo, proposta pelo físico francês Jean-Pierre G...
A Teoria do Desdobramento do Tempo
de Jean-Pierre Garnier MaletVivemos em uma era em que ciência, espiritualidade e filosofia buscam pontos de encontro para explicar nossa experiência no mundo. Entre as teorias que mais chamam a atenção nesse cenário está a Teoria do Desdobramento do Tempo, proposta pelo físico francês Jean-Pierre G...
|
114
Um Chamado para Construir o Futuro Juntos
12
imgpost/114/logopost.jpg
Community / Religion
Views :
13848
Date add :
08/13/2025
 Um Chamado para Construir o Futuro Juntos Além de Nós: Vivemos tempos em que grande parte da vida acontece na internet. O acesso à informação é imenso, mas também são imensos os riscos e as distrações. Já entendemos como esse mundo digital funciona — e sabemos que, quando mal utilizado, não acrescenta nada real.Não precisamos nos vender ou ...
Um Chamado para Construir o Futuro Juntos
Além de Nós: Vivemos tempos em que grande parte da vida acontece na internet. O acesso à informação é imenso, mas também são imensos os riscos e as distrações. Já entendemos como esse mundo digital funciona — e sabemos que, quando mal utilizado, não acrescenta nada real.Não precisamos nos vender ou ...
|
113
Roteiro de Alinhamento Energético Pessoal
13
imgpost/113/logopost.jpg
Health/Medical/Pharmacy
Views :
9609
Date add :
06/19/2025
 Roteiro de Alinhamento Energético Pessoal ROTEIRO DE ALINHAMENTO ENERGÉTICO PESSOAL (para tempos de transição)Ideal para ser feito diariamente ou 3x por semana, em qualquer fase da vida, especialmente quando estiver sentindo cansaço inexplicável, confusão mental, sensibilidade emocional ou sintomas de desdobramento.1- Enraizamento (Groundin...
Roteiro de Alinhamento Energético Pessoal
ROTEIRO DE ALINHAMENTO ENERGÉTICO PESSOAL (para tempos de transição)Ideal para ser feito diariamente ou 3x por semana, em qualquer fase da vida, especialmente quando estiver sentindo cansaço inexplicável, confusão mental, sensibilidade emocional ou sintomas de desdobramento.1- Enraizamento (Groundin...
|
112
Your Investment Works for You
46
imgpost/112/logopost.jpg
Advertising/Communication
Views :
14904
Date add :
05/28/2025
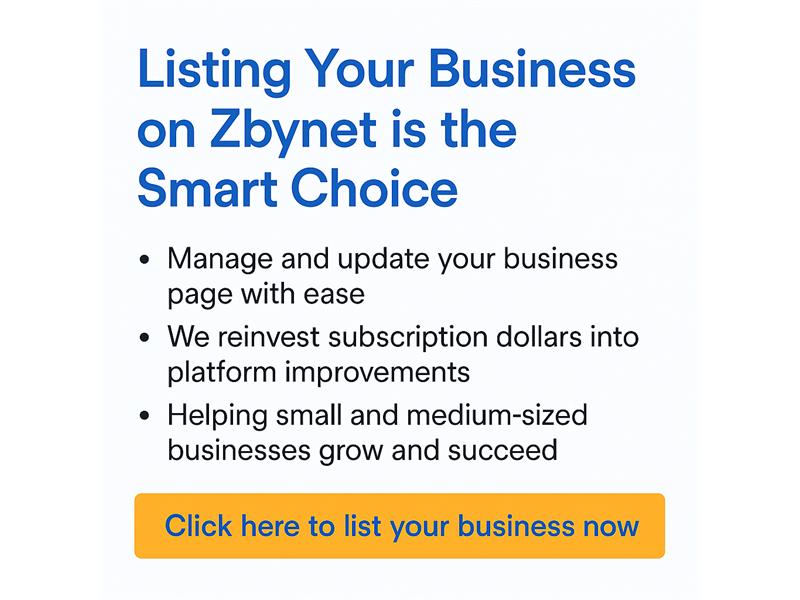 Your Investment Works for You Why Listing Your Business on Zbynet with a Subscription is the Smartest Move You Can MakeWhen you choose to subscribe and add your business to the Zbynet Platform, you're not just gaining access to powerful online tools — you're becoming part of a growing network built to support small and mid-sized...
Your Investment Works for You
Why Listing Your Business on Zbynet with a Subscription is the Smartest Move You Can MakeWhen you choose to subscribe and add your business to the Zbynet Platform, you're not just gaining access to powerful online tools — you're becoming part of a growing network built to support small and mid-sized...
|
111
Why Your Small Business Needs a Website
19
imgpost/111/logopost.jpg
Business Opportunities
Views :
14255
Date add :
05/24/2025
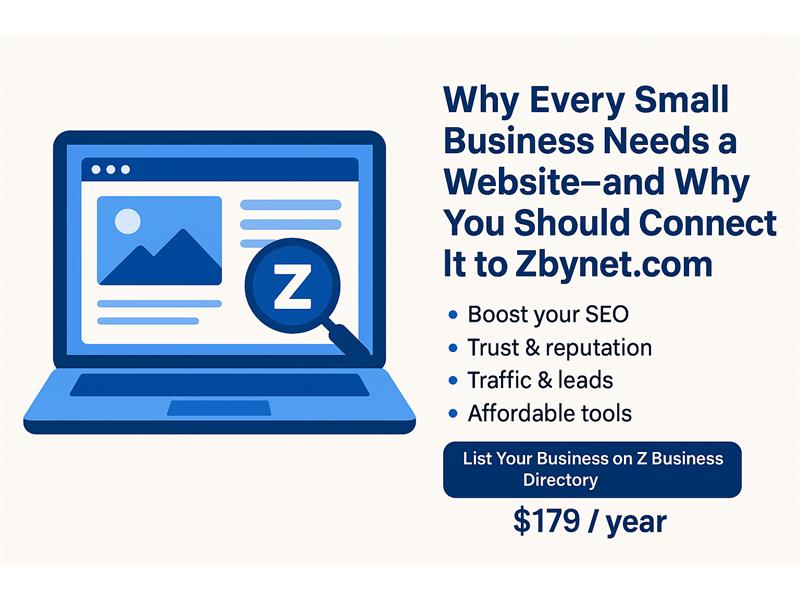 Why Your Small Business Needs a Website Why Every Small Business Needs a Website—and Why You Should Connect It to Zbynet.comIn today's digital era, having a professional online presence is not optional—it's essential. Whether you're a local service provider, a freelance professional, or a growing startup, your business must be visible whe...
Why Your Small Business Needs a Website
Why Every Small Business Needs a Website—and Why You Should Connect It to Zbynet.comIn today's digital era, having a professional online presence is not optional—it's essential. Whether you're a local service provider, a freelance professional, or a growing startup, your business must be visible whe...
|
110
Zbynet Platform Seeks Angel Investors and Entrepreneurs
19
imgpost/110/logopost.jpg
Business Opportunities
Views :
13865
Date add :
04/16/2025
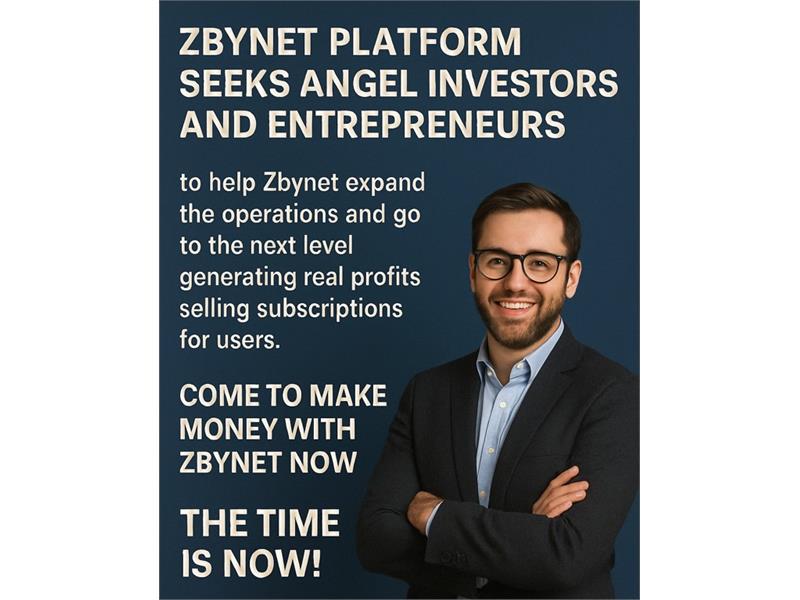 Zbynet Platform Seeks Angel Investors and Entrepreneurs to Scale Up and Share the Profits – The Time is Now!Zbynet Platform is on the rise — and we're calling on visionary angel investors and driven entrepreneurs to join us at a pivotal moment. Our mission is bold yet simple: to empower businesses of all sizes with powerful tools to manage, grow, and mo...
Zbynet Platform Seeks Angel Investors and Entrepreneurs
to Scale Up and Share the Profits – The Time is Now!Zbynet Platform is on the rise — and we're calling on visionary angel investors and driven entrepreneurs to join us at a pivotal moment. Our mission is bold yet simple: to empower businesses of all sizes with powerful tools to manage, grow, and mo...
|
109
Fim da Reeleição Parlamentar e Restrições à Candidatura de Parentes
12
imgpost/109/logopost.jpg
Community / Religion
Views :
10329
Date add :
04/15/2025
 Fim da Reeleição Parlamentar e Restrições à Candidatura de Parentes A Urgente Necessidade de Reforma na Legislação
Brasileira: A democracia brasileira, embora consolidada sob diversos
aspectos, ainda carrega sérios vícios que minam a renovação política, comprometem a ética no exercício do poder e perpetuam a influência de oligarquias familiares nas estruturas do Est...
Fim da Reeleição Parlamentar e Restrições à Candidatura de Parentes
A Urgente Necessidade de Reforma na Legislação
Brasileira: A democracia brasileira, embora consolidada sob diversos
aspectos, ainda carrega sérios vícios que minam a renovação política, comprometem a ética no exercício do poder e perpetuam a influência de oligarquias familiares nas estruturas do Est...
|
108
Differences between obtaining U S citizenship through marriage and through work
4
imgpost/108/logopost.jpg
Legal/Law Services
Views :
11619
Date add :
04/10/2025
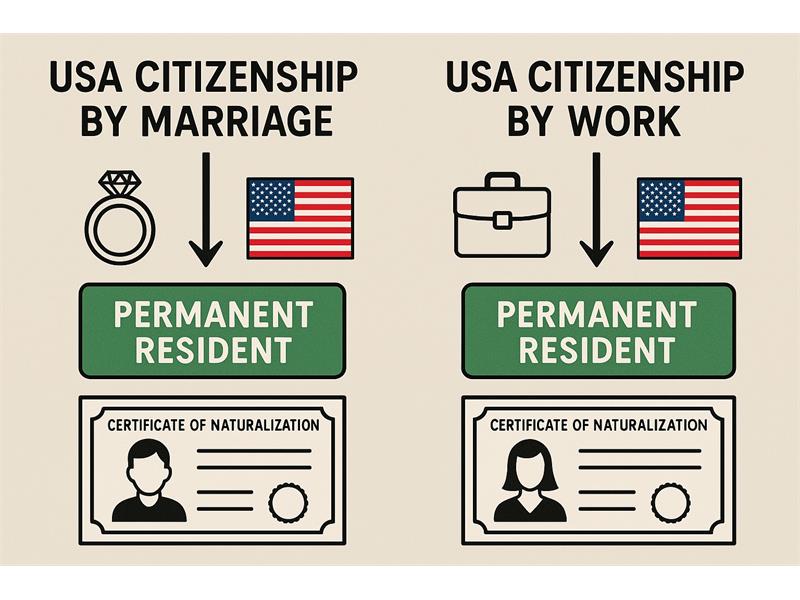 Differences between obtaining U S citizenship through marriage and through work Any differences between obtaining U Scitizenship through marriage and through work?Yes, there are several important differences betweenobtaining U.S. citizenship through marriage and through work, primarily inthe path to getting a green card (permanent residency) and eventuallyapplying for naturaliz...
Differences between obtaining U S citizenship through marriage and through work
Any differences between obtaining U Scitizenship through marriage and through work?Yes, there are several important differences betweenobtaining U.S. citizenship through marriage and through work, primarily inthe path to getting a green card (permanent residency) and eventuallyapplying for naturaliz...
|
107
How Trump's Tariffs Could Shake the Economy - and the Real Estate Market
48
imgpost/107/logopost.jpg
Real Estate Services
Views :
11929
Date add :
04/08/2025
 How Trump's Tariffs Could Shake the Economy - and the Real Estate Market How Trump's Tariffs Could Shake the Economy—and the RealEstate MarketAs the U.S. enters another phase of economic nationalismunder former President Donald Trump's proposed second-term agenda, tariffs areonce again at the forefront of his economic strategy. Trump has floated ideasfor broad tariffs of...
How Trump's Tariffs Could Shake the Economy - and the Real Estate Market
How Trump's Tariffs Could Shake the Economy—and the RealEstate MarketAs the U.S. enters another phase of economic nationalismunder former President Donald Trump's proposed second-term agenda, tariffs areonce again at the forefront of his economic strategy. Trump has floated ideasfor broad tariffs of...
|
106
Os maiores países em território (em termos de área)
35
imgpost/106/logopost.jpg
Travel Agency
Views :
10129
Date add :
04/03/2025
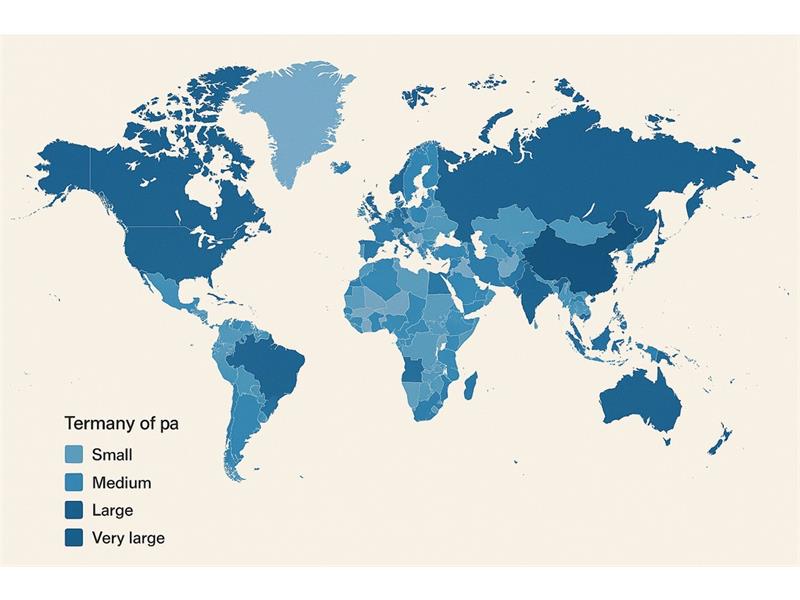 Os maiores países em território (em termos de área) Os maiores países em território (em termos de área) são:Rússia - 17,1 milhões de km²A Rússia é de longe o maior país do mundo, abrangendo uma vasta extensão da Europa e da Ásia, com diversos tipos de clima e paisagens.Canadá - 9,98 milhões de km²O Canadá é o segundo maior país, localizado na América...
Os maiores países em território (em termos de área)
Os maiores países em território (em termos de área) são:Rússia - 17,1 milhões de km²A Rússia é de longe o maior país do mundo, abrangendo uma vasta extensão da Europa e da Ásia, com diversos tipos de clima e paisagens.Canadá - 9,98 milhões de km²O Canadá é o segundo maior país, localizado na América...
|
104
O Alcorão sobre o Universo em Expansão e a Teoria do Bing Bang
12
imgpost/104/logopost.jpg
Community / Religion
Views :
10032
Date add :
03/21/2025
 O Alcorão sobre o Universo em Expansão e a Teoria do Bing Bang Lei de HubblePor milhares de anos astrônomosdisputaram contra questões básicas relacionadas ao universo.Até o início dosanos 20 acreditava-se que o universo sempre tinha existido e também que otamanho do universo era fixo e não se alterava.Entretanto, em 1912 oastrônomo americano Vesto Slipher fez u...
O Alcorão sobre o Universo em Expansão e a Teoria do Bing Bang
Lei de HubblePor milhares de anos astrônomosdisputaram contra questões básicas relacionadas ao universo.Até o início dosanos 20 acreditava-se que o universo sempre tinha existido e também que otamanho do universo era fixo e não se alterava.Entretanto, em 1912 oastrônomo americano Vesto Slipher fez u...
|
105
Unlock the Power of Zbynet Platform: Maximize Your Business Potential for Just $179/year
46
imgpost/105/logopost.jpg
Advertising/Communication
Views :
8583
Date add :
03/21/2025
 Unlock the Power of Zbynet Platform: Maximize Your Business Potential for Just $179/year In today's digital world, the ability to stand out and grow your business online is crucial for success. With so many options available to businesses, it can be overwhelming to know where to invest your time and resources. That's where the Zbynet Platform comes in, offering a unique solution that co...
Unlock the Power of Zbynet Platform: Maximize Your Business Potential for Just $179/year
In today's digital world, the ability to stand out and grow your business online is crucial for success. With so many options available to businesses, it can be overwhelming to know where to invest your time and resources. That's where the Zbynet Platform comes in, offering a unique solution that co...
|
103
The way to advertize your business are changing with AI
46
imgpost/103/logopost.jpg
Advertising/Communication
Views :
10938
Date add :
03/14/2025
 The way to advertize your business are changing with AI How Small Businesses Can Build an Effective Online Presence with AI-Driven SolutionsIn today's fast-paced digital world, the way we advertise and market businesses is undergoing a profound shift, especially with the rise of Artificial Intelligence (AI). Gone are the days when businesses needed to sp...
The way to advertize your business are changing with AI
How Small Businesses Can Build an Effective Online Presence with AI-Driven SolutionsIn today's fast-paced digital world, the way we advertise and market businesses is undergoing a profound shift, especially with the rise of Artificial Intelligence (AI). Gone are the days when businesses needed to sp...
|
102
10 Tips for you be prepared for taxes in 2025
41
imgpost/102/logopost.jpg
Accounting/Tax Service
Views :
11241
Date add :
03/13/2025
 10 Tips for you be prepared for taxes in 2025 10 Best Tips to Be Prepared for Taxes in 2025Tax season can be stressful, especially when you're scrambling at the last minute to get everything in order. But with a little preparation and organization, you can make the process much easier and more manageable. As we look ahead to 2025, here are ten ...
10 Tips for you be prepared for taxes in 2025
10 Best Tips to Be Prepared for Taxes in 2025Tax season can be stressful, especially when you're scrambling at the last minute to get everything in order. But with a little preparation and organization, you can make the process much easier and more manageable. As we look ahead to 2025, here are ten ...
|
100
2025: The Year Founders Build Better, Not Bigger
19
imgpost/100/logopost.jpg
Business Opportunities
Views :
9398
Date add :
01/02/2025
 2025: The Year Founders Build Better, Not Bigger 2024 wasn't a walk in the park. It tested us, shaped us, andreminded us that survival isn't guaranteed-but resilience pays off. As we stepinto 2025, the startup world is evolving faster than ever.This year, the rules are different. It's not about whoscales fastest-it's about who scales smartest. Thi...
2025: The Year Founders Build Better, Not Bigger
2024 wasn't a walk in the park. It tested us, shaped us, andreminded us that survival isn't guaranteed-but resilience pays off. As we stepinto 2025, the startup world is evolving faster than ever.This year, the rules are different. It's not about whoscales fastest-it's about who scales smartest. Thi...
|
101
Unlock the Future of Online Advertising with Zbynet in 2025
46
imgpost/101/logopost.jpg
Advertising/Communication
Views :
11943
Date add :
01/02/2025
 Unlock the Future of Online Advertising with Zbynet in 2025 In today's rapidly evolving digital landscape, business owners and professionals face increasing challenges to stand out, attract customers, and build trust online. In 2025, the need for reliable, innovative platforms to showcase products and services has never been greater. Enter Zbynet, the platfo...
Unlock the Future of Online Advertising with Zbynet in 2025
In today's rapidly evolving digital landscape, business owners and professionals face increasing challenges to stand out, attract customers, and build trust online. In 2025, the need for reliable, innovative platforms to showcase products and services has never been greater. Enter Zbynet, the platfo...
|
99
Aprenda a Fazer Cocô Corretamente e Seja Feliz!
13
imgpost/99/logopost.jpg
Health/Medical/Pharmacy
Views :
10426
Date add :
12/21/2024
 Aprenda a Fazer Cocô Corretamente e Seja Feliz! Aprendaa Fazer Cocô Corretamente e Seja Feliz!Bem-vindoao guia que transformará a sua rotina! Este eBook é dedicado a ensinar aspráticas corretas para ir ao vaso, garantindo saúde intestinal, prevenindodoenças e promovendo bem-estar.Por queeste tema é importante?Muitaspessoas enfrentam dificuldades ...
Aprenda a Fazer Cocô Corretamente e Seja Feliz!
Aprendaa Fazer Cocô Corretamente e Seja Feliz!Bem-vindoao guia que transformará a sua rotina! Este eBook é dedicado a ensinar aspráticas corretas para ir ao vaso, garantindo saúde intestinal, prevenindodoenças e promovendo bem-estar.Por queeste tema é importante?Muitaspessoas enfrentam dificuldades ...
|
96
The 10 best ways to make money online today
11
imgpost/96/logopost.jpg
Banks/Financial Services
Views :
12226
Date add :
10/16/2024
 The 10 best ways to make money online today Here are ten popular ways to make money online:Freelancing: Offer your skills in writing, graphic design, programming, or marketing on platforms like Upwork or Fiverr.Online Tutoring: Teach subjects you're knowledgeable about through websites like VIPKid, Tutor.com, or Chegg Tutors.Affiliate Marketi...
The 10 best ways to make money online today
Here are ten popular ways to make money online:Freelancing: Offer your skills in writing, graphic design, programming, or marketing on platforms like Upwork or Fiverr.Online Tutoring: Teach subjects you're knowledgeable about through websites like VIPKid, Tutor.com, or Chegg Tutors.Affiliate Marketi...
|
97
How to Make Money on Pinterest in 2024
19
imgpost/97/logopost.jpg
Business Opportunities
Views :
16993
Date add :
10/16/2024
 How to Make Money on Pinterest in 2024 Can You Make Money on Pinterest Today?Although the app's popularity has waned over the years, it has never
been easier to make money on Pinterest. Happily, you can make money on
the platform, either full-time or part-time. Plus, you can do so without a website or blog. In fact, pinning on Pinterest ...
How to Make Money on Pinterest in 2024
Can You Make Money on Pinterest Today?Although the app's popularity has waned over the years, it has never
been easier to make money on Pinterest. Happily, you can make money on
the platform, either full-time or part-time. Plus, you can do so without a website or blog. In fact, pinning on Pinterest ...
|
98
Why the extraterrestrial contact with races from another planet is happening first on the spiritual community
12
imgpost/98/logopost.jpg
Community / Religion
Views :
16329
Date add :
10/16/2024
 Why the extraterrestrial contact with races from another planet is happening first on the spiritual community Extraterrestrial contact with races from other planets often resonates strongly within the spiritual community for several reasons:Openness to New Ideas: The spiritual community tends to embrace concepts beyond conventional understanding, including metaphysical ideas, consciousness expansion, and th...
Why the extraterrestrial contact with races from another planet is happening first on the spiritual community
Extraterrestrial contact with races from other planets often resonates strongly within the spiritual community for several reasons:Openness to New Ideas: The spiritual community tends to embrace concepts beyond conventional understanding, including metaphysical ideas, consciousness expansion, and th...
|
95
Alfabetização Digital O caminho seguro para a nossa evolução
26
imgpost/95/logopost.jpg
Coaching/Training
Views :
10498
Date add :
10/06/2024
 Alfabetização Digital O caminho seguro para a nossa evolução O problema é que qualquer um ze mane sem qualificação na area, esta virando guru e usando ferramentas erradas, perigosas e programadas para fins escusos. Dai eles ganham dinheiro como influencers ensinando o que não sabem com a ajuda dos chats gpt. O problema são as ferramentas ou do usuário que sem...
Alfabetização Digital O caminho seguro para a nossa evolução
O problema é que qualquer um ze mane sem qualificação na area, esta virando guru e usando ferramentas erradas, perigosas e programadas para fins escusos. Dai eles ganham dinheiro como influencers ensinando o que não sabem com a ajuda dos chats gpt. O problema são as ferramentas ou do usuário que sem...
|
94
Why is important list your business on Zbynet today
19
imgpost/94/logopost.jpg
Business Opportunities
Views :
13678
Date add :
07/10/2024
 Why is important list your business on Zbynet today Listing your business on Zbynet today can be beneficial for several reasons:Increased Visibility: Zbynet is emerging as a prominent business directory, which means listing your business there can significantly enhance its visibility. This increased exposure can attract more potential customers or cl...
Why is important list your business on Zbynet today
Listing your business on Zbynet today can be beneficial for several reasons:Increased Visibility: Zbynet is emerging as a prominent business directory, which means listing your business there can significantly enhance its visibility. This increased exposure can attract more potential customers or cl...
|
93
Why are more and more older people spending their dying years behind bars?
12
imgpost/93/logopost.jpg
Community / Religion
Views :
15402
Date add :
05/13/2024
 Why are more and more older people spending their dying years behind bars? Americas prison system is turninginto a de facto nursing homeWhy are more and more older people spending their dying years behindbars?In late 2018, Richard Washington senta memo to the US Court of Appeals for the Ninth Circuit with the subjectline "Notice I am being killed." The 64-year-old man, who...
Why are more and more older people spending their dying years behind bars?
Americas prison system is turninginto a de facto nursing homeWhy are more and more older people spending their dying years behindbars?In late 2018, Richard Washington senta memo to the US Court of Appeals for the Ninth Circuit with the subjectline "Notice I am being killed." The 64-year-old man, who...
|
92
The 10 new and best ai websites doing all kinds of products
17
imgpost/92/logopost.jpg
Computer/Internet Services
Views :
17325
Date add :
05/10/2024
 The 10 new and best ai websites doing all kinds of products Here are some of the best AI websites that you might find interesting:ChatGPT : A versatile chatbot with a wide range of conversational abilities. It's easy to implement and scales well. While it's not specialized in specific industries, it offers text-based interaction and API access for customizat...
The 10 new and best ai websites doing all kinds of products
Here are some of the best AI websites that you might find interesting:ChatGPT : A versatile chatbot with a wide range of conversational abilities. It's easy to implement and scales well. While it's not specialized in specific industries, it offers text-based interaction and API access for customizat...
|
90
Coaching plays a crucial role in today's business landscape, especially during these technological times
26
imgpost/90/logopost.jpg
Coaching/Training
Views :
14977
Date add :
05/08/2024
 Coaching plays a crucial role in today's business landscape, especially during these technological times Coaching plays a crucial role in today's business landscape, especially during these technological times. Let's explore why coaching is essential and how it can benefit your business:The Importance of Coaching in Business1. Adapting to Technological ChangesDigital Transformation: As businesses under...
Coaching plays a crucial role in today's business landscape, especially during these technological times
Coaching plays a crucial role in today's business landscape, especially during these technological times. Let's explore why coaching is essential and how it can benefit your business:The Importance of Coaching in Business1. Adapting to Technological ChangesDigital Transformation: As businesses under...
|
91
The importance of online advertising for businesses and explore how the Zbynet Platform can be beneficial in achieving better results at lower costs
46
imgpost/91/logopost.jpg
Advertising/Communication
Views :
14056
Date add :
05/08/2024
 The importance of online advertising for businesses and explore how the Zbynet Platform can be beneficial in achieving better results at lower costs Let's delve into the importance of online advertising for businesses and explore how the Zbynet Platform can be beneficial in achieving better results at lower costs.The Importance of Online Advertising for Businesses1. Wide Audience CoverageOnline advertising allows businesses to reach a global aud...
The importance of online advertising for businesses and explore how the Zbynet Platform can be beneficial in achieving better results at lower costs
Let's delve into the importance of online advertising for businesses and explore how the Zbynet Platform can be beneficial in achieving better results at lower costs.The Importance of Online Advertising for Businesses1. Wide Audience CoverageOnline advertising allows businesses to reach a global aud...
|
88
Sonho Americano: Viver e Trabalhar nos EUA - As 10 Verdades por Trás
19
imgpost/88/logopost.jpg
Business Opportunities
Views :
10573
Date add :
05/06/2024
 Sonho Americano: Viver e Trabalhar nos EUA - As 10 Verdades por Trás O "Sonho Americano" é uma expressão que ressoa não apenas nos ouvidos dos cidadãos dos Estados Unidos, mas em corações e mentes ao redor do
mundo. Ele evoca imagens de oportunidade, liberdade e a promessa de uma
vida melhor, independentemente da origem de uma pessoa. Mas como
exatamente essa ideia s...
Sonho Americano: Viver e Trabalhar nos EUA - As 10 Verdades por Trás
O "Sonho Americano" é uma expressão que ressoa não apenas nos ouvidos dos cidadãos dos Estados Unidos, mas em corações e mentes ao redor do
mundo. Ele evoca imagens de oportunidade, liberdade e a promessa de uma
vida melhor, independentemente da origem de uma pessoa. Mas como
exatamente essa ideia s...
|
89
Here are ten safe and secure travel destinations you might consider for your next trip
35
imgpost/89/logopost.jpg
Travel Agency
Views :
14234
Date add :
05/06/2024
 Here are ten safe and secure travel destinations you might consider for your next trip Safety is a top priority when planning a vacation. Here are ten safe and secure travel destinations you might consider for your next trip, along with some explanations:Canada: Canada tops the list as the safest country to travel to in 2024. It has low rates of violent crime and strict gun laws. Howe...
Here are ten safe and secure travel destinations you might consider for your next trip
Safety is a top priority when planning a vacation. Here are ten safe and secure travel destinations you might consider for your next trip, along with some explanations:Canada: Canada tops the list as the safest country to travel to in 2024. It has low rates of violent crime and strict gun laws. Howe...
|
87
50 Free Websites to List Your Business and Services
46
imgpost/87/logopost.jpg
Advertising/Communication
Views :
25712
Date add :
04/03/2024
 50 Free Websites to List Your Business and Services Every business, regardless of its size, should prioritize being prominently featured on listing websites. In the current digital age, it's essential to ensure your company's name, contact details, and services are available on numerous listing websites. Major platforms like Yelp and Google Business ...
50 Free Websites to List Your Business and Services
Every business, regardless of its size, should prioritize being prominently featured on listing websites. In the current digital age, it's essential to ensure your company's name, contact details, and services are available on numerous listing websites. Major platforms like Yelp and Google Business ...
|
85
Avanços no Tratamento da Dengue: Esperança em Meio à Adversidade
13
imgpost/85/logopost.jpg
Health/Medical/Pharmacy
Views :
11070
Date add :
03/14/2024
 Avanços no Tratamento da Dengue: Esperança em Meio à Adversidade ****A dengue, uma doença transmitida por mosquitos, é um problema de saúde global que afeta milhões de pessoas a cada ano. Com seus sintomas debilitantes e, em casos graves, potencialmente fatais, a busca por tratamentos eficazes tem sido uma prioridade para a comunidade médica e científica. Felizme...
Avanços no Tratamento da Dengue: Esperança em Meio à Adversidade
****A dengue, uma doença transmitida por mosquitos, é um problema de saúde global que afeta milhões de pessoas a cada ano. Com seus sintomas debilitantes e, em casos graves, potencialmente fatais, a busca por tratamentos eficazes tem sido uma prioridade para a comunidade médica e científica. Felizme...
|
86
What to do to became an artist on these days?
1
imgpost/86/logopost.jpg
Arts & Entertainment
Views :
16650
Date add :
03/14/2024
 What to do to became an artist on these days? Becoming an artist in today's world can be an exciting and fulfilling journey, but it also requires dedication, passion, and adaptability. Here are some steps you can take to pursue a career as an artist:1. **Discover Your Passion**: Explore different art forms such as painting, drawing, sculpture, ...
What to do to became an artist on these days?
Becoming an artist in today's world can be an exciting and fulfilling journey, but it also requires dedication, passion, and adaptability. Here are some steps you can take to pursue a career as an artist:1. **Discover Your Passion**: Explore different art forms such as painting, drawing, sculpture, ...
|